When not using room lists, booking rooms in Outlook requires quite many steps. You have to click on “New Meeting” > Invite a room by clicking on “To” > Find a room and thereafter add it to the meeting.
Luckily, there is an easier way of booking rooms that utilizes room lists. This step by step guide will show you how to use room lists in Outlook and in Outlook Web App.
Room lists in Outlook and Outlook Web App
A room list contains, unsurprisingly, a list of rooms. Your administrator can have several different room lists depending on your needs, most commonly you will have one room list per building, office or floor.
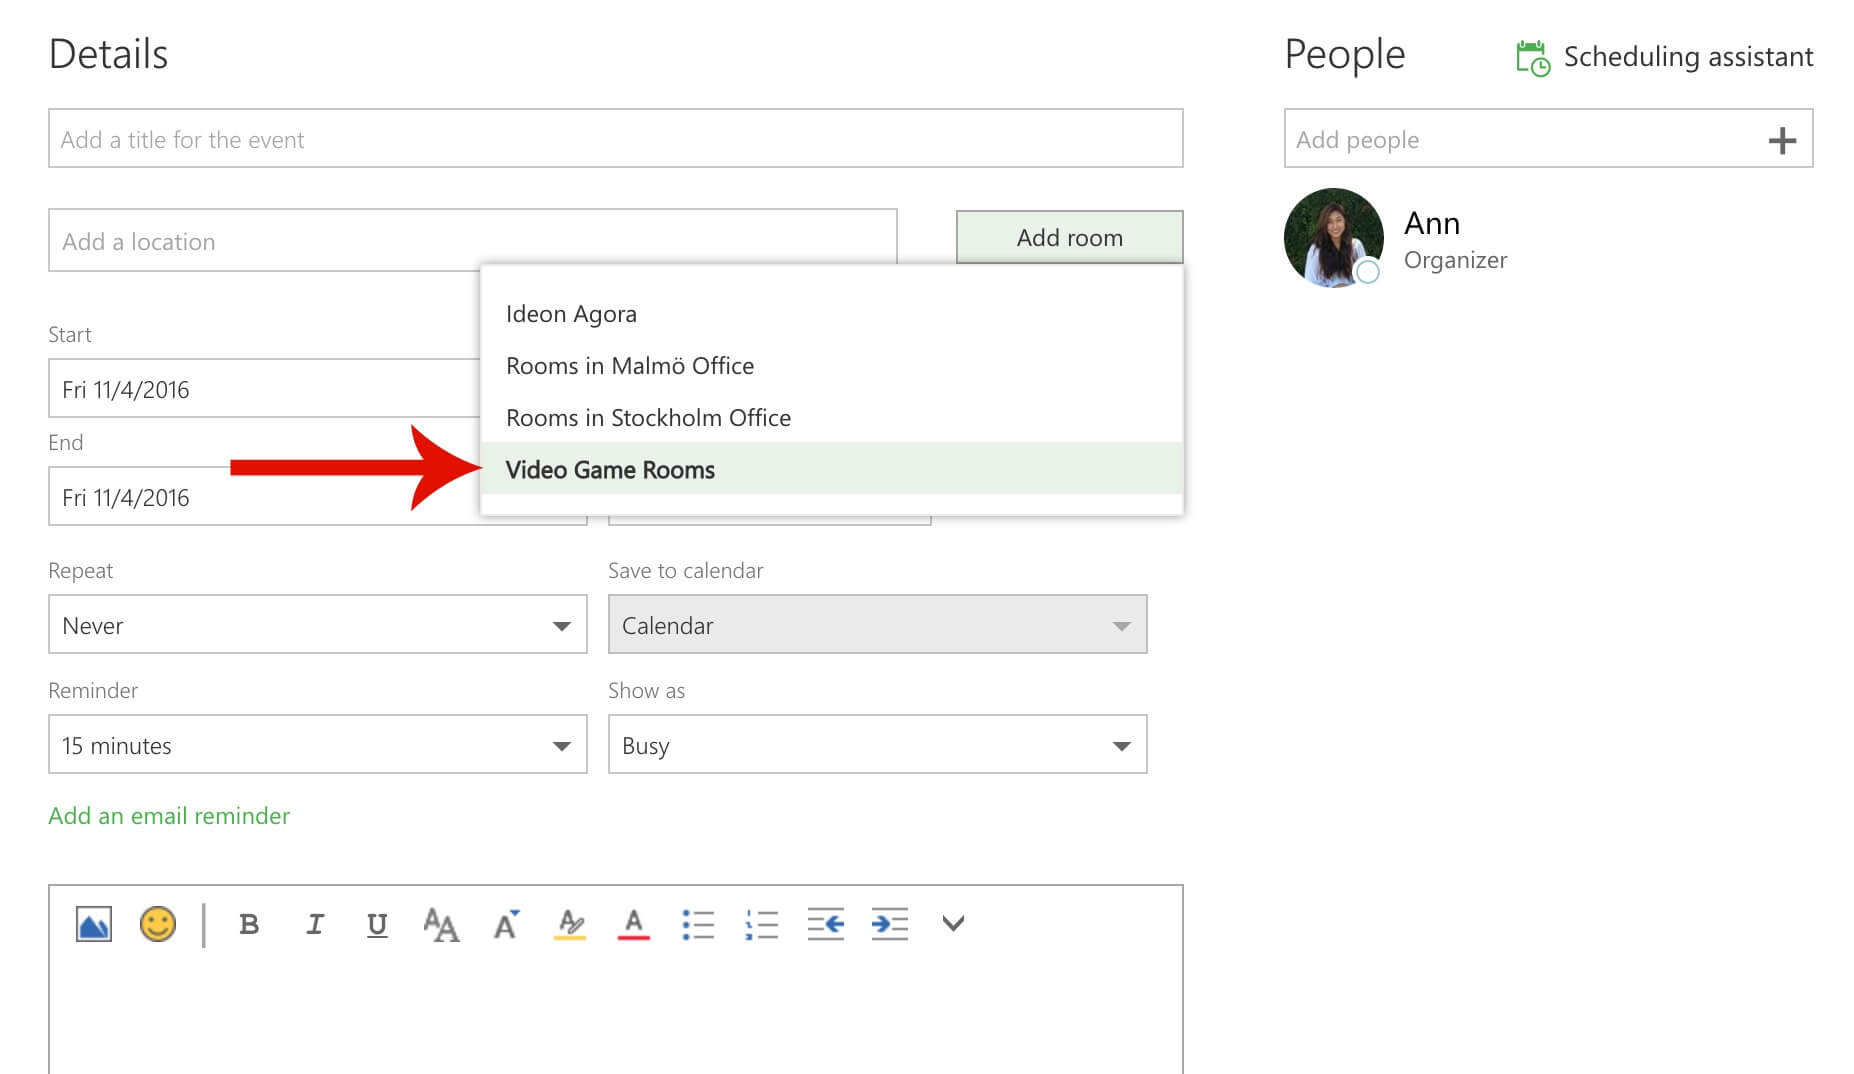
Once you click “Add room” (in Outlook Web App) or select Room Finder (in Outlook), you can choose from available room lists.
Can’t find the room lists in the menu? Don’t worry, ask your Exchange Administrator to read this quick guide on how to create room lists through Exchange.
Outlook web app
Outlook Web App
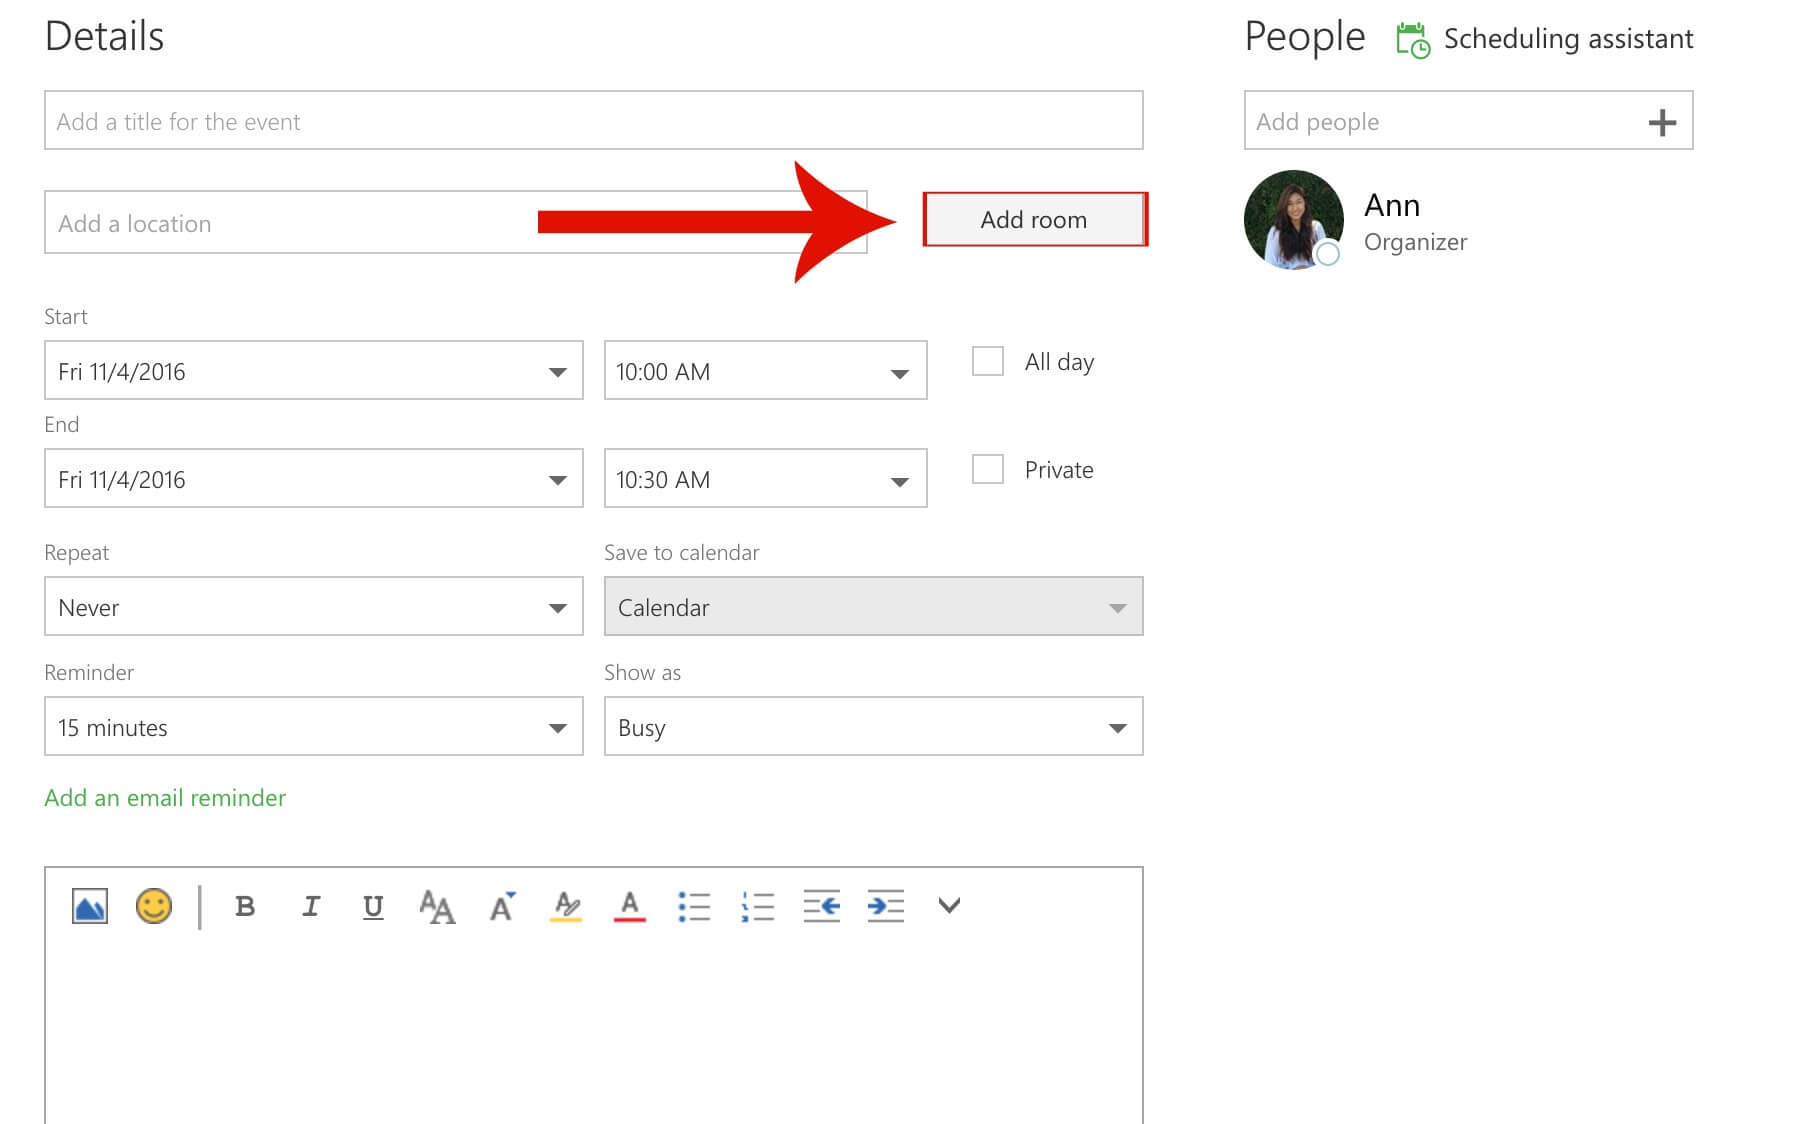
Step 1: Click on “add room”
Step 2: Choose an office
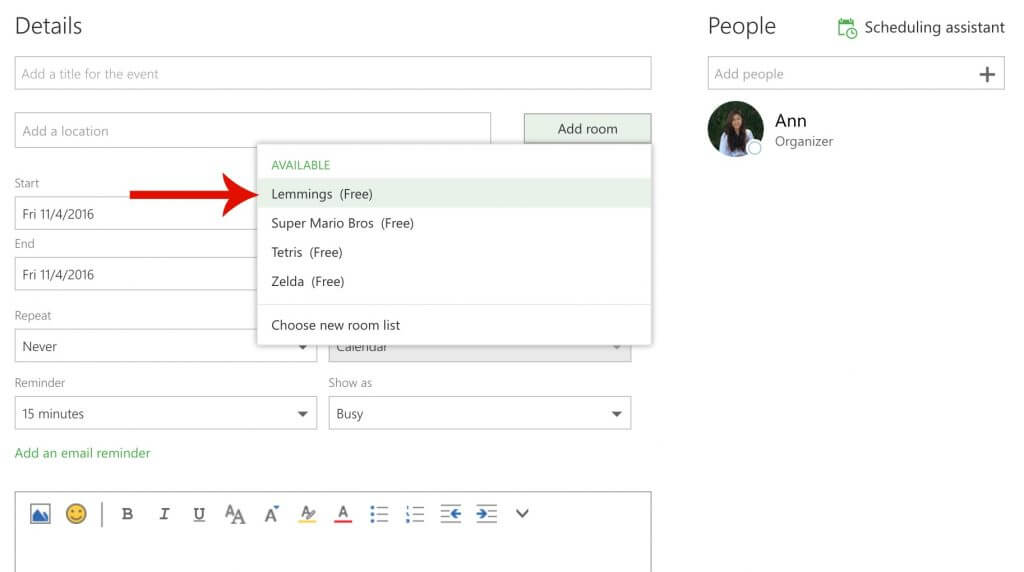
Step 3: Choose a meeting room
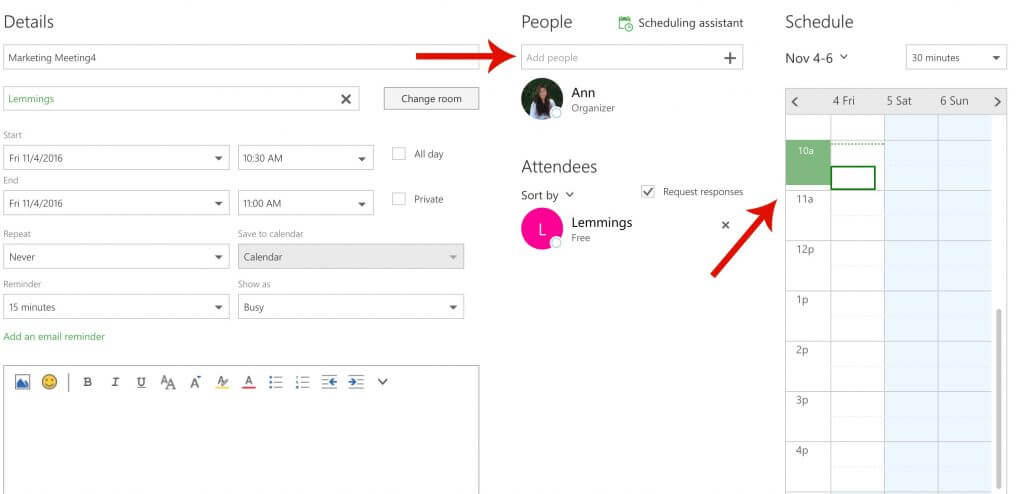
Step 4: Add people and check the availability schedule
Outlook Client (2013 and newer)
Step 1: Enable room finder by opening a new meeting
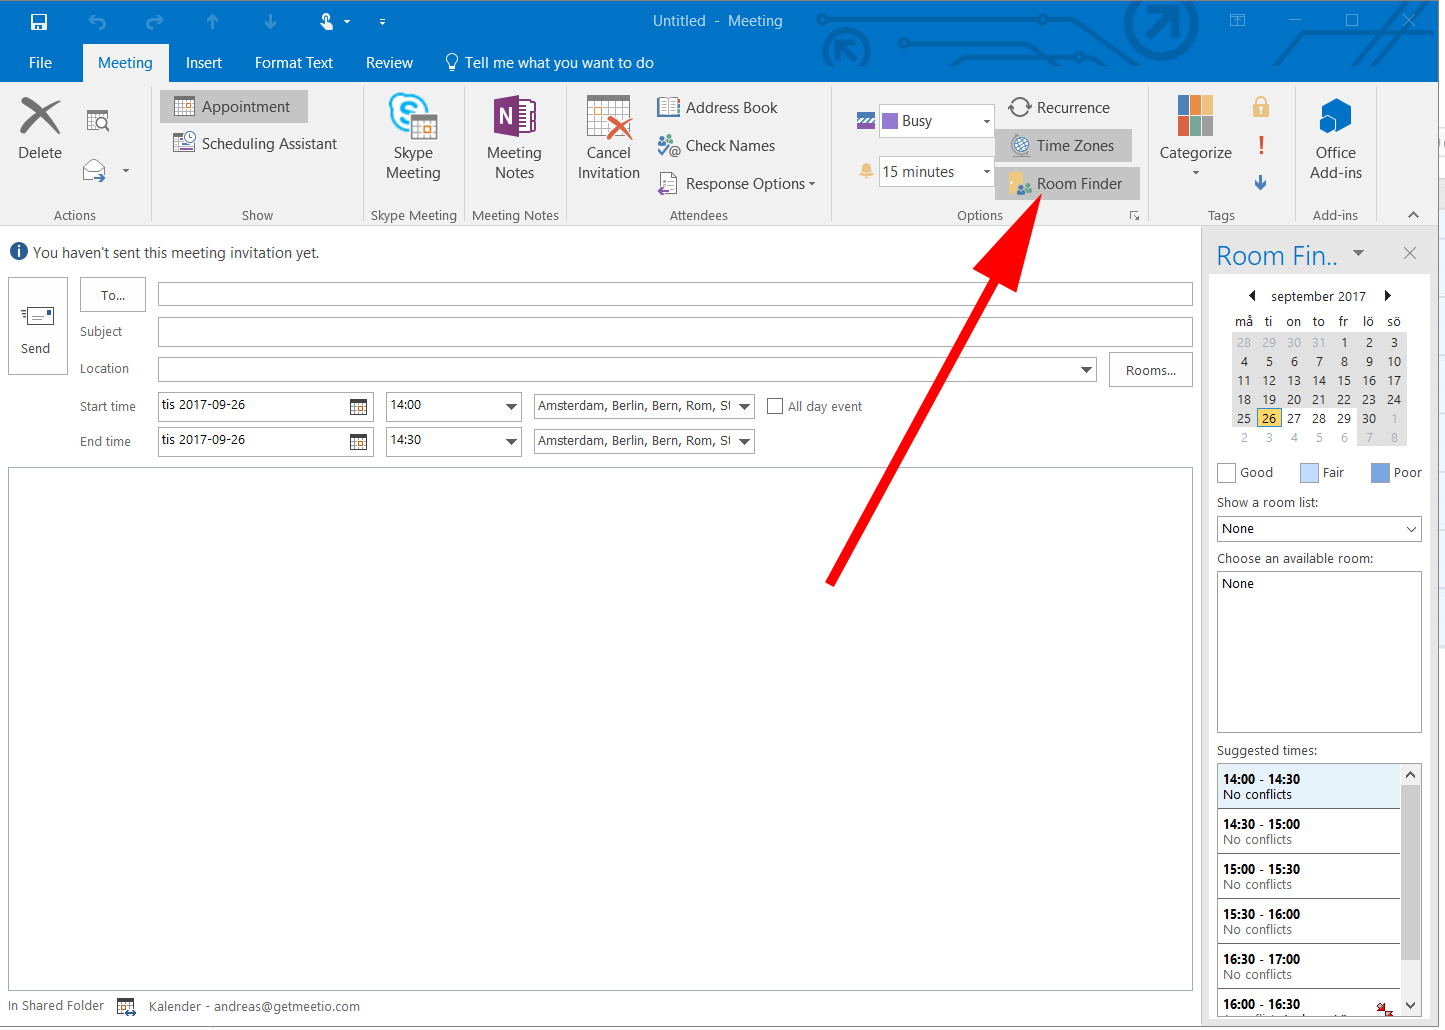
Step 2: Select a room list
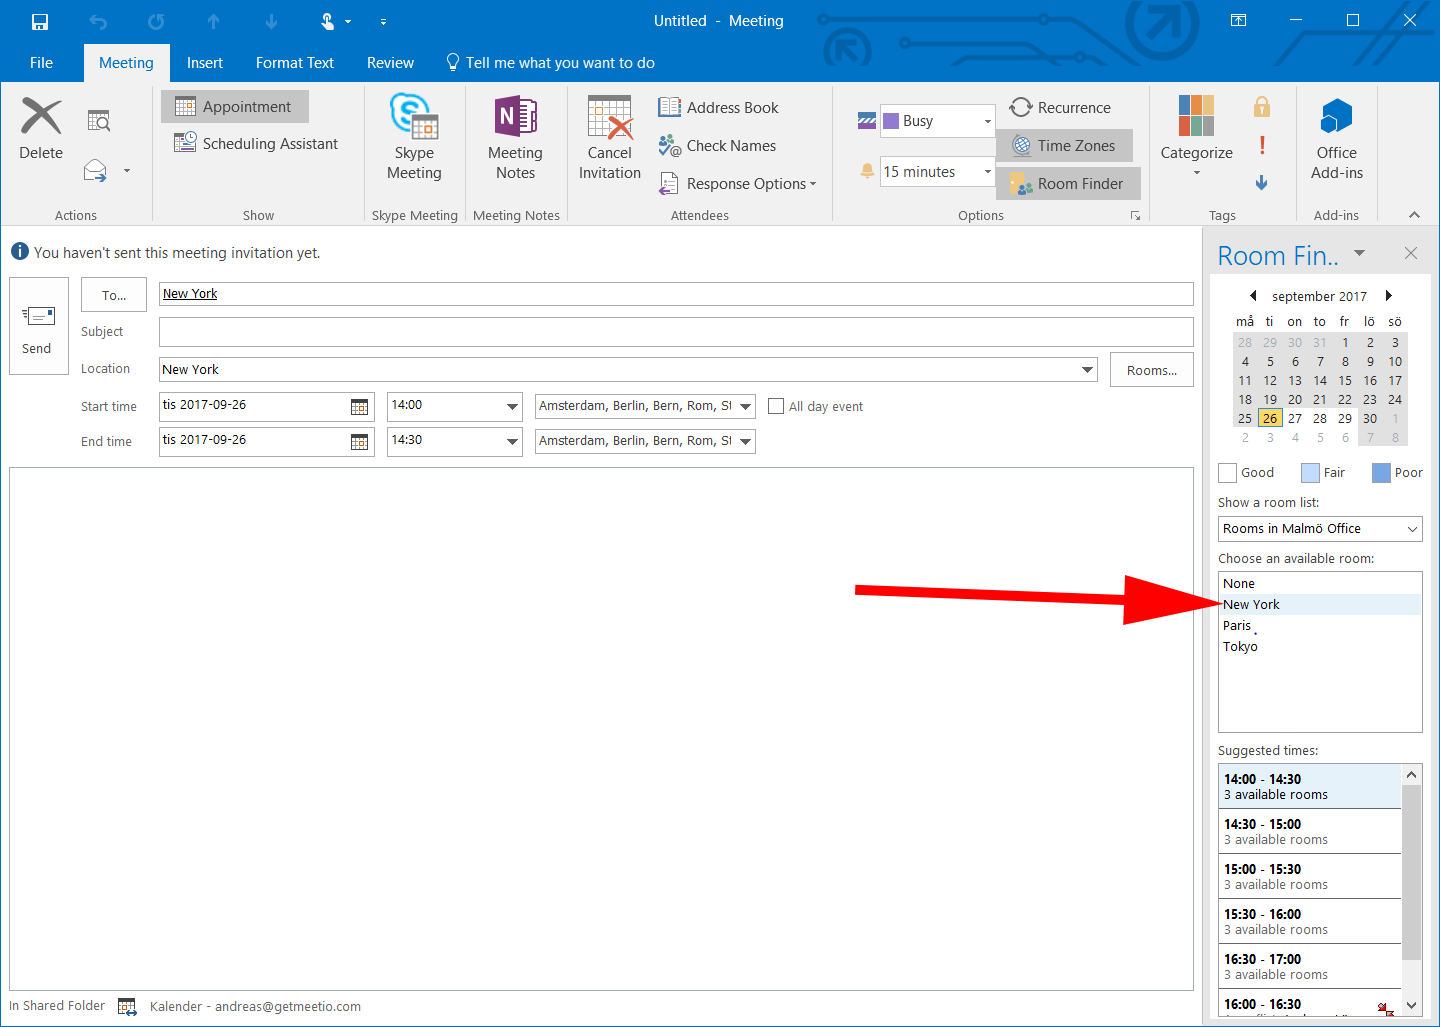
Step 3: Select date and time for your meeting
Step 4: Choose a meeting room
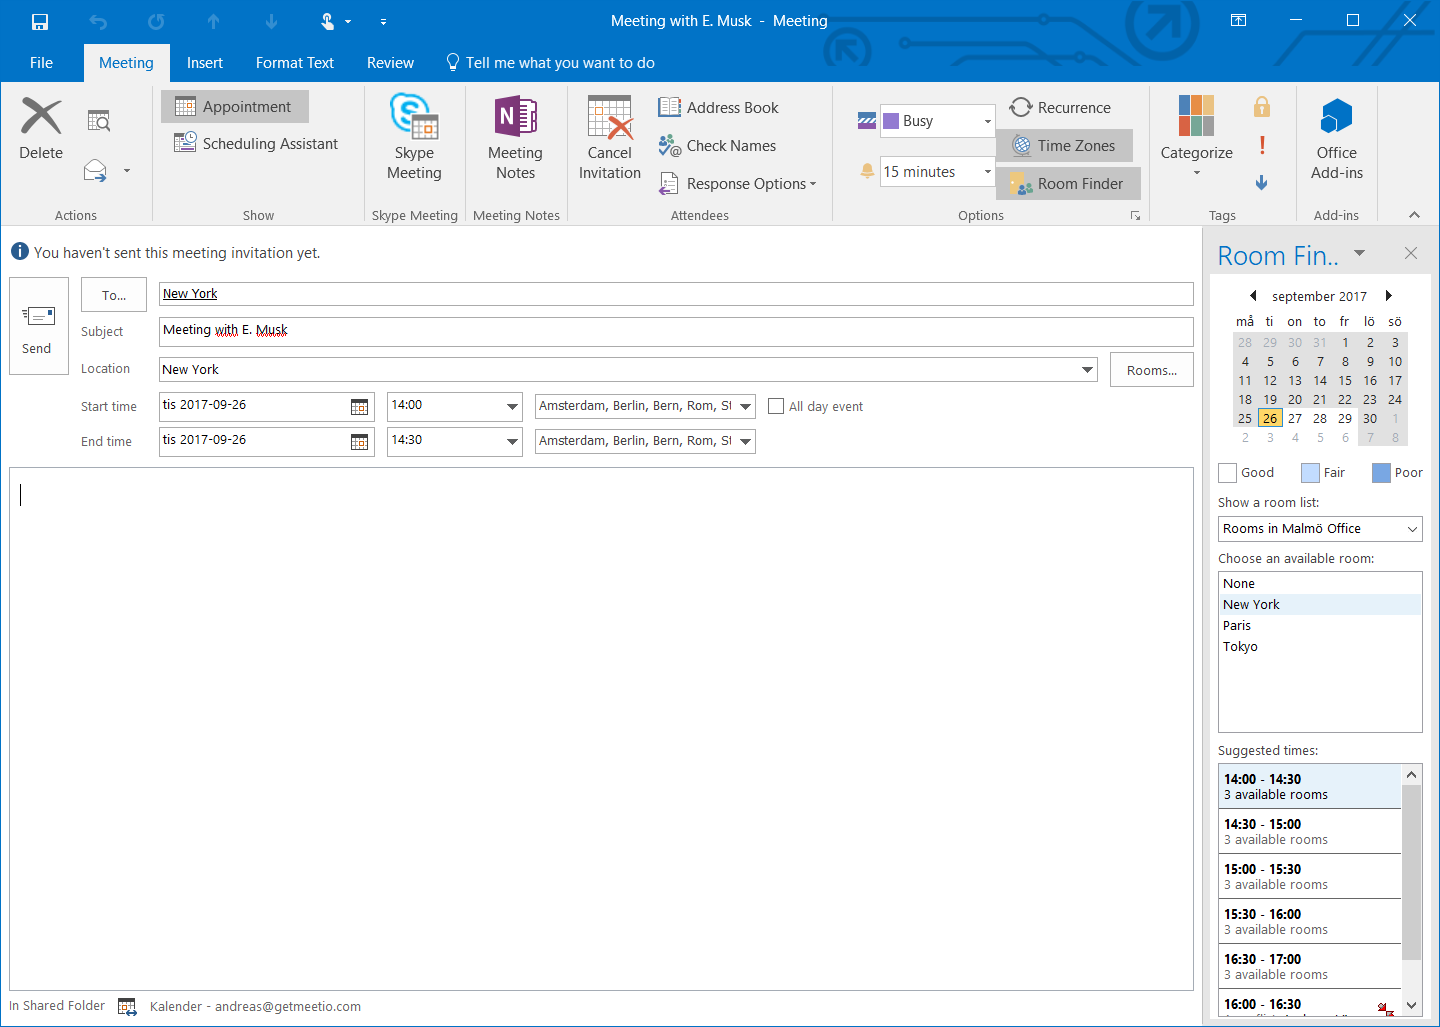
Step 5: Choose a subject and add other attendees
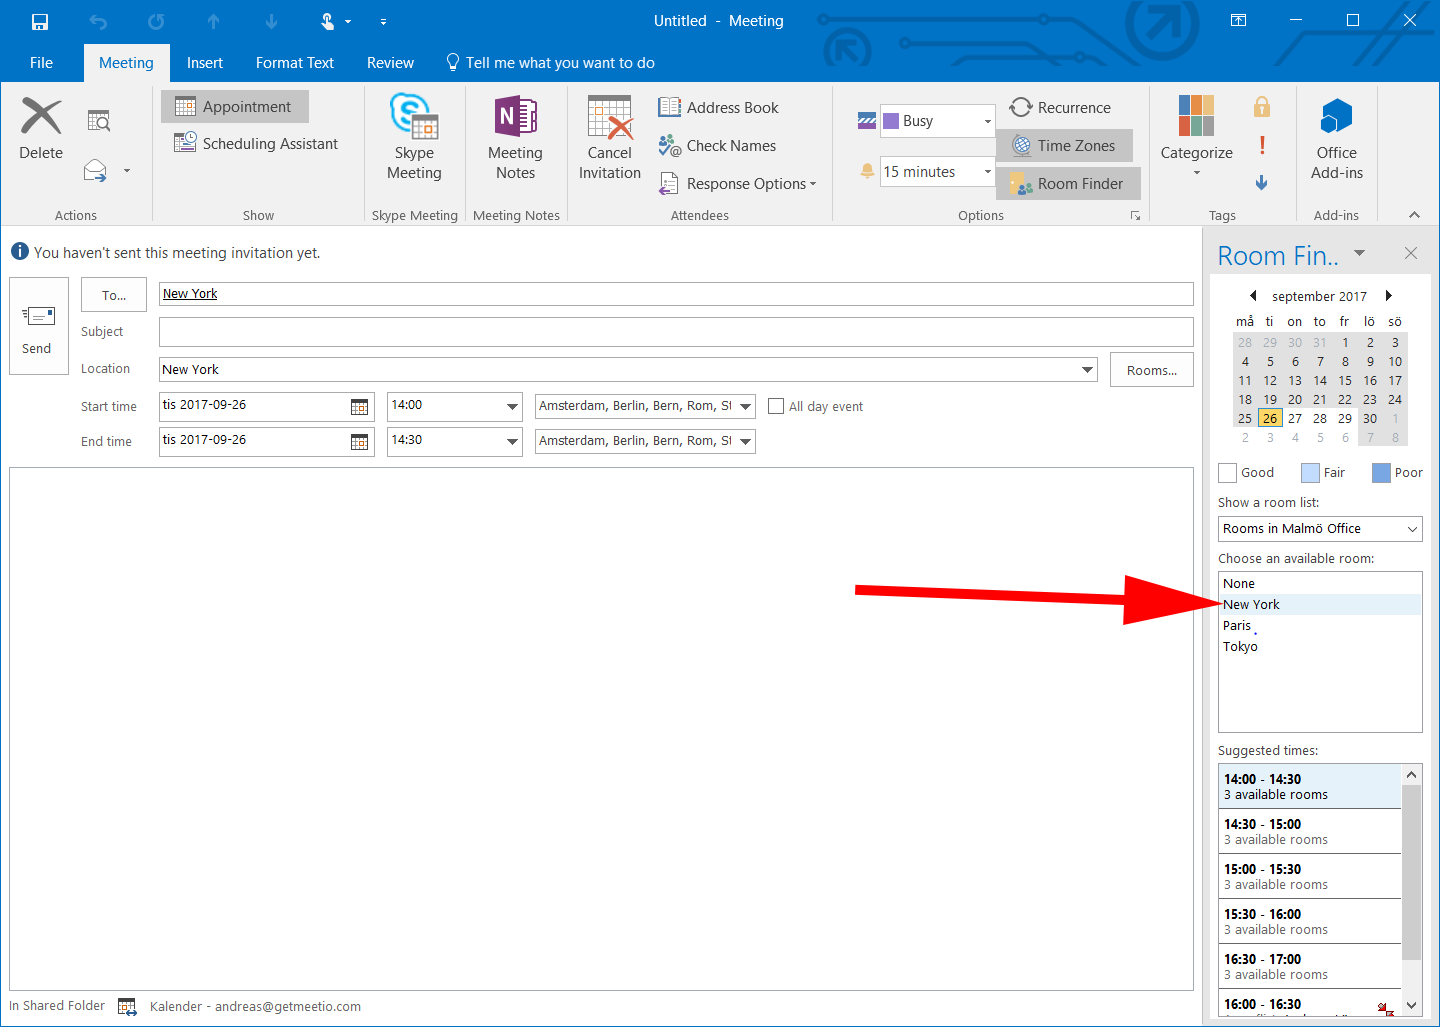
All done!