First, you will want to decommission your old device and free up your license to use with the new device.
- Login to Meetio Admin (https://admin.getmeetio.com) with your administrator account.
- Go to “Devices” (https://admin.getmeetio.com/devices) and click edit on the device you want to replace.
- Click “Deallocate” to free up the license from the device.
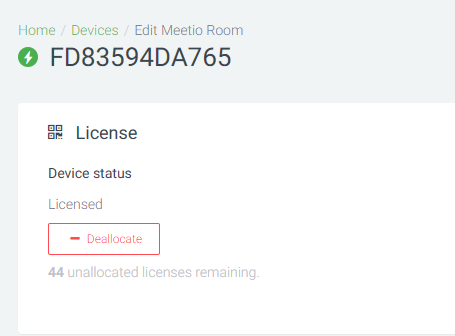
(Note: if the device is disconnected, you will not be able to deallocate the license. Instead, simply deleting the device from Meetio Admin will also free up the license).
- (optional) Delete the old device from Meetio Admin to clean up the dashboard.
Prepare Logitech Sync:
Before setting up the device, it is recommended to setup a Logitech Sync account. Logitech Sync is a portal for managing your Logitech Hardware devices. This step is optional, and you can always skip it during setup and do it later (see end of this guide).
If you already have a Logitech Sync account that you want to use, skip this section.
- Go to sync.logitech.com and click “Sign up”. Provide an email address and the name of your organization, and acknowledge the privacy policy & terms of service. Then, click “Sign up.”
- You will now receive an email verification. Find the email that was sent to you, and click “Verify my email.”
- You now need to fill in first and last name, as well as choose a password.
- You will now be prompted to add a room. If you don't have any other Logitech equipment in the room, select the option “Empty Room.”
- Create your rooms with their names and capacity.
- Now you are ready to setup the device itself.
Preparing the Logitech Tap Scheduler:
Unpack the box and follow the provided mounting instructions. Once you have the device mounted and connected with POE, do the following:
- First, you will be prompted with regional settings. Select your country, timezone and language (the selected language will also apply to the Meetio Room app)
- Next, accept the terms & conditions.
- Select which type of network connection you will be using (wireless or wired).
- If you have a custom NTP (network time protocol) server you wish to use, fill in the details in this step (default for the Tap Scheduler is time.android.com).
- Fill in proxy details if you are using one, other skip this step.
- You will now be prompted for software updates. It is recommended to do this, and can take 15-20 minutes.
- Once the update is complete, you will be prompted to select a provider. Click Meetio and click next.
- You will now be prompted for Logitech Sync. You can login with the same account you created in the previous section, or you can find the room’s provisioning code from the Sync portal. Once you are logged in, select your organization and the room and click connect.
- Finally, you will be presented with an overview of the choices you have made. Click next and then click “launch Meetio.”
The device will now launch into Meetio Room. Once the loading is complete, you will be presented with a serial number to register in your Meetio Admin portal.
- Go to “Devices” in Meetio Admin.
- Click “New device” and select Meetio Room.
- Type the serial number and click "ok."
- Device will now connect to Meetio Admin and you can assign a room to it.
(If you did not connect the device to Logitech Sync during the setup process, you can do this at any time by following these steps)
- On the device, click on the logo in the top right to access the settings (type your PIN if you have one configured).
- Click on “Launch Logi settings” and then “Sync.”
- Login to Logitech sync with your Logitech Sync account.
- Select your org and room.
- Done!
FAQ
Q: Timeformat is set to 12h instead of 24h, how do I change this?
A: In the Logi settings, click on "System" and then click “reset regional settings,” you will now be able to select time format.
Q: I cannot update my Meetio software on the Tap Scheduler from Meetio Admin.
A: Meetio Updates are included in the Logitech firmware updates, so you only need to update from Logitech.